You don’t need to be a master craftsperson to make something that will help brighten your cat’s day! Making simple toys, hiding places and comfy beds will bring your very best feline friend lots of fun and stimulation, and it’s a great way to show your cat you love them.
A little bit of DIY can be very satisfying for you and your cats; the majority of the following ideas can be recycled from everyday items around the home – so why not give it a go and try your hand at doing it yourself?
14 Fun Ideas to Make For Your Cat
First of all, consider your cat’s favourite way of playing; do they like to hide, do they like to chase or climb, or does the lure of a dangling toy keep them occupied? But remember, always supervise your cat playing with these toys in case something comes loose.
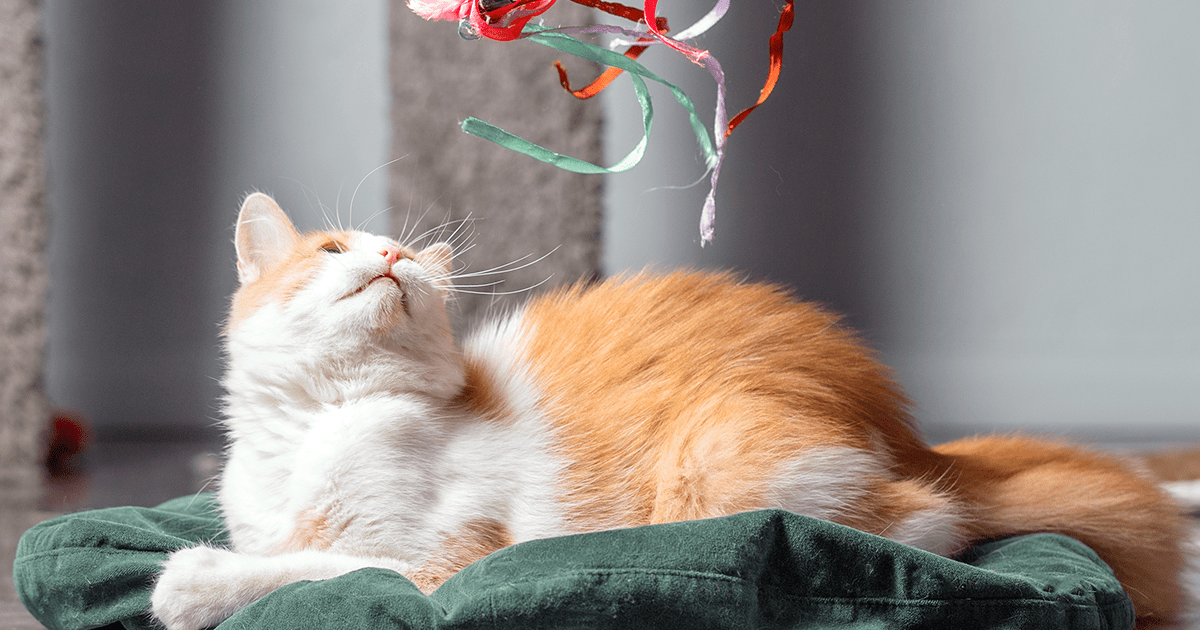
1. Cat Wand Toy
Cats can’t often ignore the lure of a cat wand toy!
You will need:
- A length of wooden dowel (approx 30-50 cm long)
- A length of twine/string (approx 20-30 cm long)
- Items to ‘dangle’, e.g. feathers, small bells, scraps of fabric
Get Started!
- Adults: if you are safe and able to do so, drill a hole about half an inch from one end of the dowl. The hole should be large enough to thread your string through. Children should start making from Step 2.
- Alternatively, simply tie the string securely to the end of your stick.
- Tie a knot in the string so that it cannot be pulled back through the hole.
- Tie your choice of toy to the other end of the string and get dangling. Your kitty will love it!
Tip: If you want a sturdier string, plait strips of material together. This will also be easier for your cat to catch in their claws.
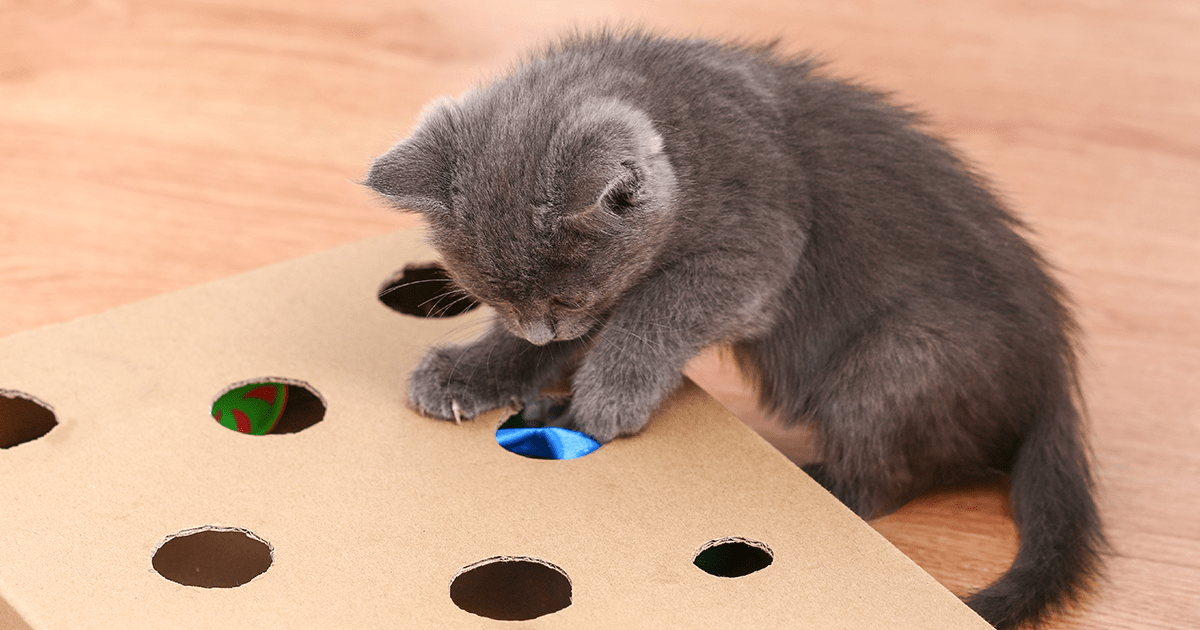
2. Puzzle Box
Keep your kitty busy with trying to access their favourite toys!
You will need:
- A plastic/cardboard box with a secure lid
- A round object, like a glass or pastry cutter
- A sharp blade
- A marker pen
- A few of your cat’s small favourite toys, like a ping-pong ball, a feather or some bells. A few treats will go down well too!
Get Started!
- Use the glass/pastry cutter as a template to draw two round circles on the lid of the box with the marker pen. Make sure the circles are large enough for your cat’s paw and the toy to fit through.
- With a sharp blade (please take care, children should be supervised) cut out the circles to leave two holes in the lid.
- Put the toys in the box, replace the lid, et Voilà! You have a puzzle box that your kitty will love exploring.
- Ring the changes and swap toys around to keep your kitty stimulated.
Tip: When cutting out the circles, be careful not to leave rough edges that may damage your cat's paws.
Cardboard box ideas
With online shopping becoming ever more popular, most goods are delivered in a cardboard box. Fortunately, these are environmentally friendly, but before putting them out for recycling, why not give them an extra lease of life and turn them into toys for your cat? Here are some ideas:
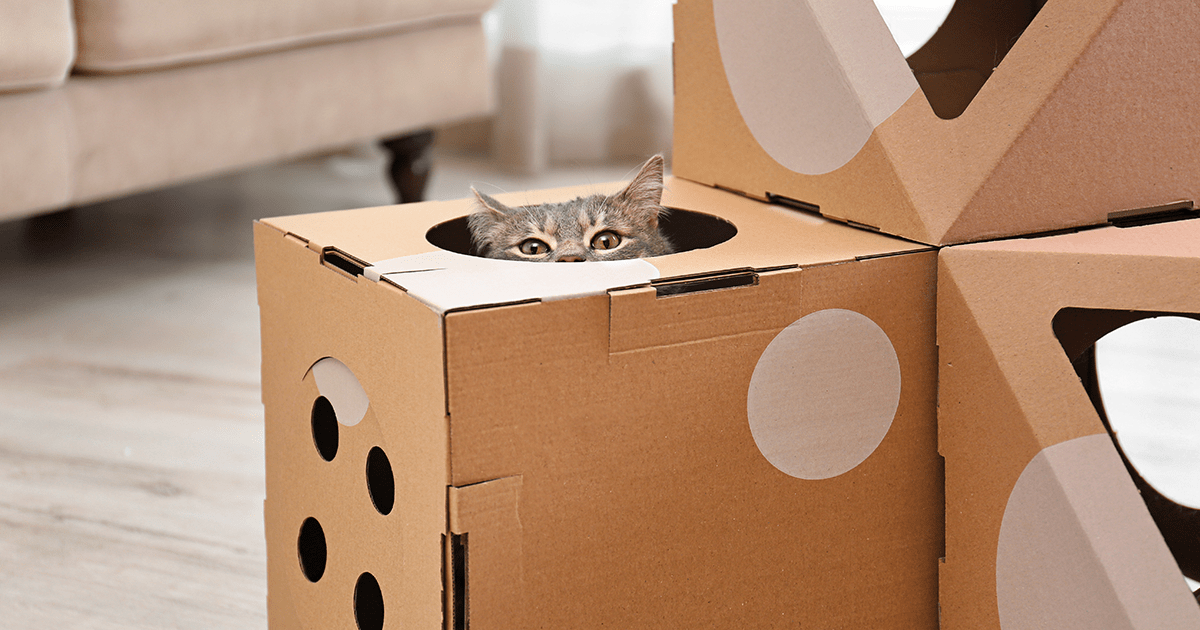
3. Cat hideout
Cats love to hide, so why not make their very own specially-made-for-them hideout!
You will need:
- A cardboard box, large enough for your cat to fit inside.
- An old t-shirt with a wide neck, large enough to go over the box. One that carries your personal smell would be perfect – and reassuring for your cat.
- Some of your cat’s favourite bedding.
Get Started!
- Make sure all flaps are secure, but leave one side of the box open (with flaps secured inside for stability).
- Pull the t-shirt over the box, with the open neck placed over the open end of the box. This will be their access.
- Tuck any sleeves inside the t-shirt so they don’t flap.
- The remainder of the t-shirt can be tied into a knot to secure it tightly around the box.
- Place your kitty’s favourite bedding inside the box, along with some of their favourite toys, and put the hideout in a quiet corner of the room.
- Wait until they climb in through the neck and discover their new secret hiding place.
Tip: Spray the inside of the box with FELIWAY Classic Spray and they’ll be sure to find their new hiding spot very calming and relaxing.
4. A Cardboard Box Castle
There’s no end to the number of rooms and floors your cardboard box castle can have, so get creative with all those Amazon cardboard boxes!
You will need:
- A number of cardboard boxes, depending on what size of castle you want (just make sure your cat will fit inside!)
- A pair of scissors or blade
- A pen or marker
- Glue
- A length of twine/string to match the height of your box
Get Started!
- Lay out the cardboard boxes to the shape and size of your castle.
- Keep one box aside for making the turrets.
- Decide where the doors, windows, and drawbridge will be and mark the shapes out with your pen or marker. Plan to put these on the non-flap sides of your box.
- Keep as many flaps as possible for extra sturdiness. Glue the flaps in place.
- You can make your rooms side by side, or one on top of the other. Whichever style, make sure you plan access holes on both boxes that will match up so that your cat can climb through.
- Cut out the door, windows and drawbridge shapes with your blade or scissors (children, please ask an adult for help to cut out shapes). Remember, only cut the drawbridge on 3 sides – leave the bottom edge secure to the box.
- When you have all shapes cut out, glue the boxes together, making sure the access holes inside match up.
- Cut the turret shapes out of your spare box and glue them around the top of your castle.
- Back to the drawbridge! Punch a hole on each corner at the top of the drawbridge and two more holes where it meets the wall of the castle. Thread a piece of string/twine through the hole of the wall on each side and then through the holes on the drawbridge. Secure by tying knots at each end of the string.
- Eureka! You’ve made a kitty castle! Be sure to put some cosy bedding and some of their favourite treats inside.
Tip: For that extra pizazz, it can be painted or decorated with flags to your (or your kitty’s) liking.
5. Cardboard Scratchers
Some boxes are made of corrugated cardboard, which lends itself beautifully to being made into a cat scratcher. These are easy to make and your cat will love them!
You will need:
- Corrugated cardboard
- Regular cardboard
- Sharp blade
- Glue
- Pole and an additional cardboard box for the base (for option 2)
Get Started!
- Circular: Cut out strips of corrugated cardboard and roll them up together into a tight circle. Glue or tie them together to keep them secure. Use the circle to cut out a template of plain cardboard and glue this to the bottom of your corrugated cardboard roll to make it sturdy.
- Skyscraper: Cut corrugated cardboard into a number of squares, all the same size. The exact number will depend on the length of your pole and what height you want the scratcher to be.
- Use the end of your pole to draw a template on each of the squares and cut out each hole.
- Punch holes in the centre of each corrugated cardboard square.
- Make a hole in your cardboard box base and push your pole through the hole, leaving the longer length on top. This will keep your pole upright and stable.
- Thread your squares onto the top of your pole and build up your skyscraper.
Tip: Making ‘blocks’ of different sizes of corrugated cardboard and threading them onto the pole will make it more interesting for your kitty to explore.
6. Cat hammock
The ultimate luxury snoozing place for your cat!
You will need:
- An old, small table or stool with horizontal supports half way down the legs (these will make your hammock more stable).
- An old, small hand towel or piece of fabric that is wider than the space between the legs, and large enough to hang with a dip in the middle.
- Four sturdy hooks that will screw into the legs.
- Four grommets (small metal rings to enclose holes) to make strong holes in the fabric (optional). This will stop the fabric fraying around the holes and give your hammock a longer lifespan.
Get Started!
- Turn the table/stool upside down, making sure that it is standing level and secure.
- Screw the hooks into the table legs at the same distance from the top, making sure you leave enough space for the hammock to dip, but not too much so that it hits the bottom when your cat climbs in.
- Measure and cut your fabric to size, leaving enough fabric for the hammock dip.
- Measure the same distance from each corner of your hand towel/fabric and punch a hole in each corner with the grommet (if using). Alternatively, snip four holes in the fabric with small, sharp scissors.
- If your table/stool has the horizontal supports, you could also tie each corner of your fabric around the leg and above the support; this will stop the hammock from sliding down the legs.
- Hang the four corners of the fabric onto the hooks on the chair and Ta-Da!, you have a kitty hammock that you can place in a nice sunny spot for your cat to chill out!
Tip: If you leave enough space underneath the hammock, you can place some of their favourite bedding on the bottom and your kitty will have a choice of two cosy places to cat nap.

7. Knitted Bird Toy
There are lots of patterns out there to create a small soft toy for your cat to play with. Here’s a very simple pattern for a knitted bird toy that your kitty will love!
Bird toy
You will need:
- Pair of 4mm straight knitting needles
- Darning or tapestry needle to sew together
- Handful of toy filling per toy
- DK (double knitting) yarns, less than 25g per colour per toy: green, pink, yellow, red, black and blue
- Small piece of white felt fabric
Get Started!
Bird body (Make 1)
Cast on 37 sts in green on straight 4mm needles.
Row 1: p (37 sts, WS)
Row 2: k (37 sts)
Rows 3 to 24: rep rows 1 and 2 eleven times (37 sts)
Row 25: p (37 sts)
Row 26: k1, (k2tog, k4) six times (31 sts)
Row 27: p (31 sts)
Row 28: k1, (k2tog, k3) six times (25 sts)
Row 29: p (25 sts)
Row 30: k1, (k2tog, k2) six times (19 sts)
Row 31: p (19 sts)
Row 32: k1, (k2tog, k1) six times (13 sts)
Row 33: p (13 sts)
Row 34: k1, (k2tog) six times (7 sts)
Pull through to cast off.
Bird tummy (Make 1)
Cast on 33 sts in pink on straight 4mm needles.
Row 1: k (33 sts, WS)
Row 2: k1, (k2tog, k2) eight times (25 sts)
Row 3: k (25 sts)
Row 4: k1, (k2tog, k1) eight times (17 sts)
Row 5: k (17 sts) Row 6: k1, (k2tog) eight times (9 sts)
Pull through to cast off. Then sew the side edges together to make a circular shape.
Bird legs (Make 2)
Cast on 14 sts in yellow on straight 4mm needles, then cast off all sts to make a small strip.
Note that the body cast off sts are the top of the head. Sew the side edges together, leaving the cast on edge open. This seam runs down the side of the body. Sew the pink tummy piece onto the front of the body. Embroider a triangle-shaped beak in yellow yarn over the top of the tummy.
Cut two circles (1cm diameter) of white felt fabric, place on the body above the beak and embroider a French knot in black yarn on top of the felt pieces. Then stuff the body and sew the cast on edge closed at the bottom. Sew the middle of each foot piece to the bottom of the bird to finish.
Other Cat-Pleasing DIY Ideas
Make sure your kitty feels right at home with some of these DIY ideas!
8. A Cat Bed
We know how cats have lots of different places for their cat naps – so you could knit, crochet or sew a cushion for one of their favourite snoozing spots. You could even put some dangling toys on the corner for them to play with when they wake up. Why not make one for each cozy corner?
9. Yarn Ball
Instead of your cat playing with your balls of yarn as you use them, how about creating a ball that is not going to unravel? Simply glue some yarn around a Styrofoam ball and leave a long end so you can dangle the toy.
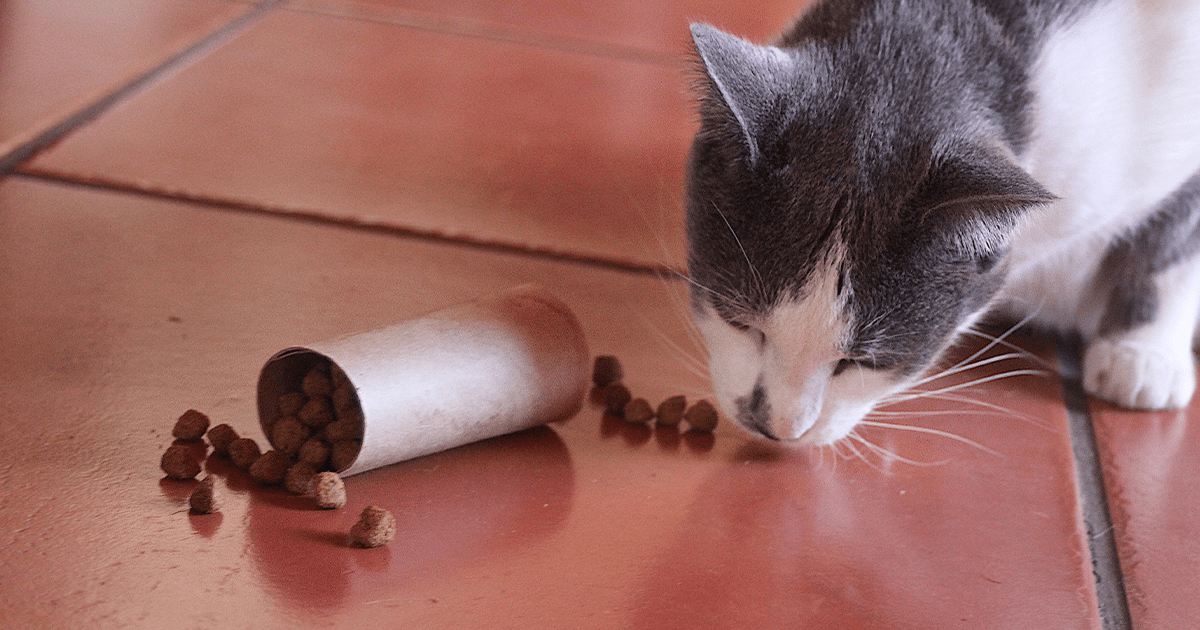
10. Toilet Roll Food Dispenser
Simply make some holes in the side that are big enough to let some treats or kibble out, add the food pieces and then fold over the 2 ends. Your kitty will have great fun trying to get the treats out as it rolls along the floor.
11. Sock Fish
Everyone has a drawer full of odd socks! Don’t let them go to waste, but turn them into fun ‘fish’ toys. Find something to stuff them with – something like scrunched up paper that will make a noise, or even other odd socks. Stuff your packing into the sock, tie the end and fan it out to look like a fish tail. You could even pop a bell inside the stuffing to make a noise!
12. Kitty Zone
Install cat shelves on a wall (or create a high walkway) for your cats to explore extra 3D space. If you have a spare area in your home that you can dedicate to your cat, you can build them a kitty-zone by installing a variety of shelves, scratchers, and hiding places!
13. Cat Grass
How about growing your cat some cat grass? The most common types of cat grass are wheatgrass, barley grass, oat grass, and ryegrass that can be grown indoors or outdoors; it is also a popular digestive aid among cats.
For indoors, get yourself a box lid or an old shallow baking tray, and fill it with soil. Sew cat grass seed according to the packet. Keep it moist, partially cover with a plastic wrap and put it in a warm place. When the seedlings appear, place on a sunny windowsill until your grass grows – your kitty will love their indoor garden!
14. Cat Treats
Always keep your kitty’s health and weight in mind – but if you’re celebrating a special occasion, like Christmas, Easter or a birthday, don’t forget to let your cat join in and make some special treats for them.
We hope we’ve inspired you with a few DIY ideas – so why not get making and share them with us on our Facebook and Instagram pages!